
Laying terracotta tiles is more than just a craft – it is a respectful approach to a living natural material. In this article, we show what really matters: from the correct subfloor and the choice of adhesive and joint width to impregnation and maintenance. For anyone who values durability, character, and true craftsmanship.
Do you remember the first time you walked barefoot across a natural floor? That feeling of warmth, grounding, and authentic material? This is exactly the experience that handmade terracotta tiles bring – not just as a surface covering, but as an integral part of a room with soul.
However, installing these characterful tiles differs fundamentally from standardized ceramic coverings. It requires a fine sensitivity for the material, technical knowledge, and care at every step of the process. In this guide, we’ll take you through all the essential phases – from subfloor preparation to long-term maintenance – with both expertise and practical insight.
Laying Terracotta Tiles – The Right Subfloor as a Foundation
The subfloor plays a central role when laying terracotta tiles. Due to their mineral composition and open-pored structure, terracotta tiles are particularly sensitive to moisture and stress within the underlying construction. Therefore, a precise assessment of the existing conditions is essential.
Requirements for a suitable subfloor:
- Dryness: The residual moisture of the screed must not exceed 0.5% CM for calcium sulfate screeds and 2% CM for cement screeds.
- Evenness: According to DIN 18202, deviations must not exceed 3 mm over a measuring length of 2 m.
- Load-bearing capacity: No cracks, no hollow spots, no loose layers.
For heated floors (underfloor heating), a documented heating and cooling protocol is required. Without proper preconditioning, thermal stresses can cause the adhesive bond to break. The protocol ensures that the screed dries evenly and without tension – a crucial prerequisite for the long-term adhesion of the tiles.
A deep-penetrating mineral primer is recommended to balance absorbency and improve adhesion.
Sorting, Mixing, and Pre-Laying – Preparing for the Color Variation

Handmade terracotta tiles naturally show variations in color, texture, and size. This is not a flaw but a true expression of their artisanal origin. To achieve a harmonious overall appearance, it is recommended to:
- Mix tiles from at least three boxes in advance
- Dry-lay the tiles on the surface to check transitions and color flow
- Define the laying pattern beforehand
Joints – Balancing Function and Design
Joints in natural stone and terracotta flooring serve two purposes: they compensate for dimensional tolerances and significantly influence the overall appearance of the floor.
Recommendations
- Joint width: at least 4–6 mm, depending on tile format and dimensional tolerance
- Grout cement-based, flexible, and permeable to water vapor
- Grout color should be coordinated with the terracotta tone – either “tone-on-tone” or deliberately contrasting
Mistakes to Avoid
- Joints that are too narrow increase tension and risk of cracking
- Mortar edge staining can occur on unsealed tiles if no impregnation is applied before grouting
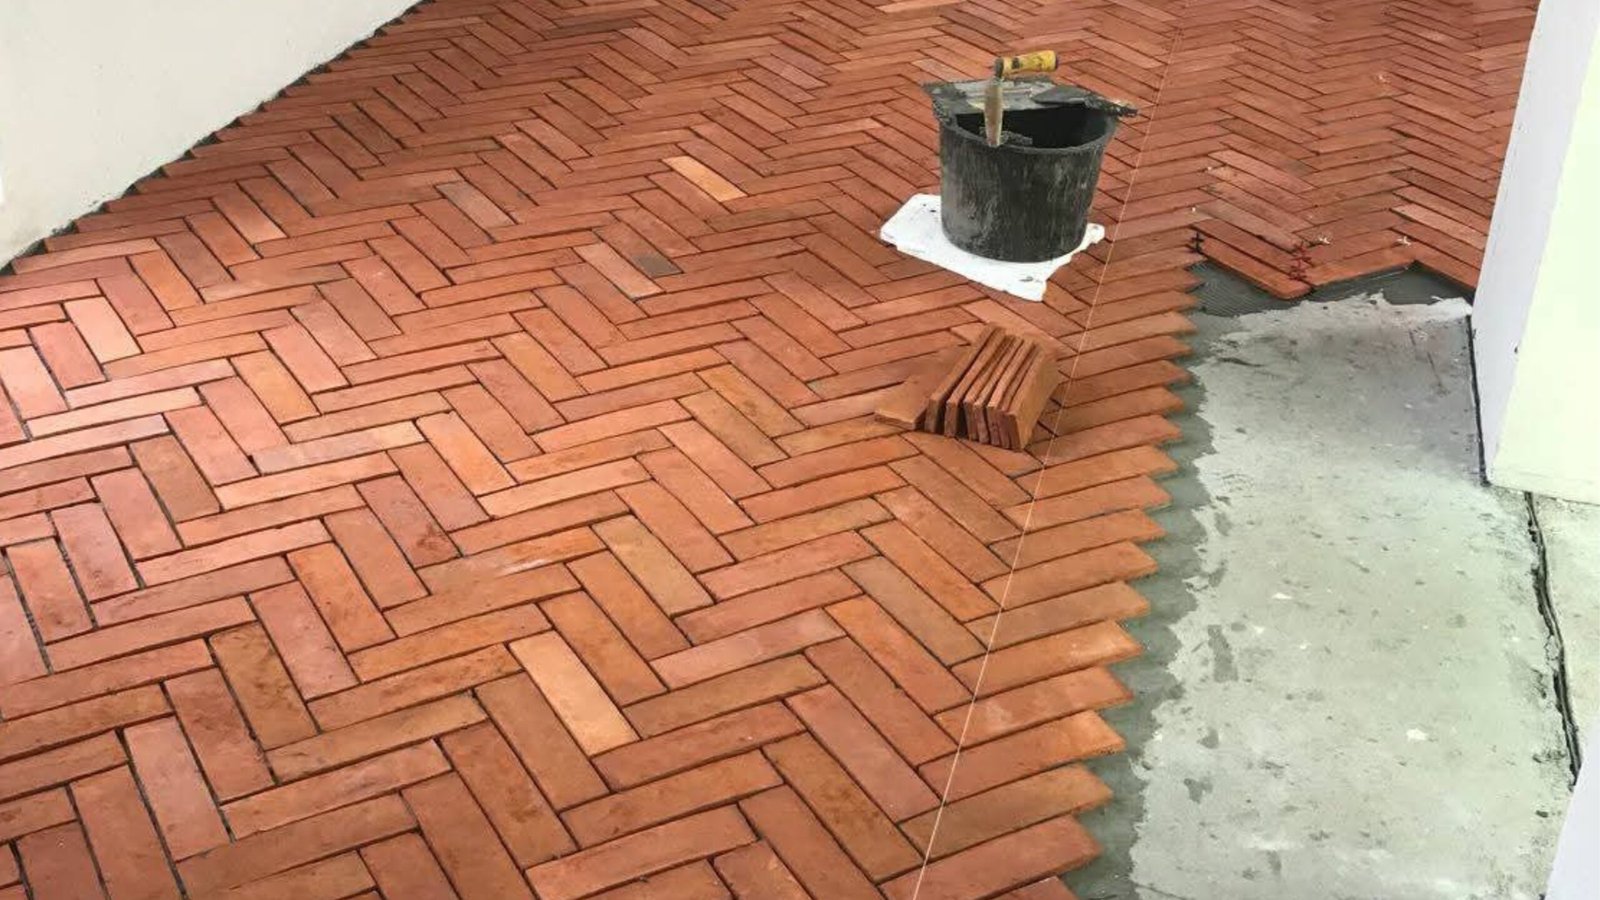
Choice of adhesive and installation technique are crucial for proper bonding and long-term durability

A suitable flexible adhesive should be used for laying terracotta tiles. Not every tile adhesive is appropriate for terracotta. Due to its high capillary absorption, specially formulated adhesives are recommended:
- Cement-based flexible adhesives (C2 TE S1) with extended open time
- Avoid dispersion adhesives, as they block breathability
- Use the buttering-floating method, meaning apply adhesive both on the subfloor and on the back of the tile
Additional Tip
A too rapid withdrawal of water from the adhesive (e.g., due to highly absorbent tiles) can reduce bonding performance. In such cases, it is advisable to lightly moisten the back of the tiles.
Impregnation – Protection from the Very Beginning
After laying terracotta tiles, impregnation protects the surface. Terracotta tiles must be impregnated before grouting. The reason is that cement-based grout contains fine particles that can penetrate the open-pored structure and leave permanently visible stains or edge marks.
Impregnation Process:
- First coat: before grouting – transparent, non-film-forming, and non-layer-forming
- Second coat: after final cleaning
- Optional: finish or wax to enhance the visual appearance
Choice of Impregnation Products
- Oil-based impregnation: enhances color, creates a warm appearance, ideal for living areas
- Silicate-based: matte finish, deep penetration, suitable for high-traffic zones
- Silicone-resin-based: combines protection with slight color enhancement, potentially suitable for outdoor areas
If you would like to learn more about the proper impregnation of terracotta, we recommend our detailed article: Protection for Generations – How to Properly Seal Terracotta Tiles.
Cleaning & Care – Preserving Character Through Proper Maintenance
An impregnated terracotta floor is easy to maintain – as long as it is treated correctly.
- pH-neutral cleaning solution: use regularly and sparingly
- Avoid steam cleaners as well as chlorine- or acid-based products
- Refresh impregnation every 1–3 years, depending on the level of use
Over time, a natural patina develops that should never be mistaken for dirt: it reflects use, history, and warmth. If desired, this patina can be further enhanced with a care wax.
Conclusion: Terracotta Tiles – A Living Material That Deserves Proper Treatment
Terracotta is a natural product with centuries of tradition. Anyone who chooses this flooring should not treat it like a mass-produced material. With proper planning, suitable materials, and skilled craftsmanship, laying terracotta tiles results in a floor that lasts for generations and becomes even more beautiful over time.
Would you like to learn more about terracotta tiles, or do you have a project or specific questions about laying terracotta tiles? Get in touch with us – we will be happy to provide individual, expert advice with a focus on what truly matters.
Further helpful articles:
👉 Sealing Terracotta Tiles – A Practical Guide
👉 Discover Our Handmade Terracotta Tiles